Lisa Lately

Random musings about life, family, and crochet

My Photo
Name: Lisa
Location: Indiana, United States

I'm a perfectionist. What more do you need to know?

Monday, February 21, 2005

Look! Up in the Air! It's Lisa the Copyeditor!


I had a little spare time on my hands this evening and nothing to crochet, nothing to read, nothing to watch on TV. And I'm brain-dead from copyediting a difficult book that's requiring heavy concentration on my part. Yep, not a good combination.

So here's the result:


Here I am, the fearless copyeditor, ready to tackle another manuscript. Posted by Hello


Want to make one yourself? Go to the Mini-Mizer on Christopher Doyle's Reasonably Clever website.

Oh, and thanks for all the nice comments and e-mail about my hats, and especially about Brigid!

Friday, February 18, 2005

Hats!

Okay, I've got hats. Lots of hats. As I mentioned sometime earlier, my mother-in-law asked me to make her a hat. So I did. But I couldn't make her just one hat. What if it didn't fit? What if it wasn't the right texture? What if she didn't like it? What if I wasn't such an obsessive perfectionist?

Well, hats are really easy to make, and quick, too, so I bought a few skeins of several different yarns—Lion Brand Homespun in Edwardian (a mix of shades of black) and Wool-Ease in Chocolate (dark brown), Bernat Soft Bouclé in Misty Shades (a mix of shades of brown), and Caron Jewel Box in Deep Jasper (a brown and black mix)—and I made a bunch of hats. So now Mom gets to go "shopping" in my box of finished hats!

Complicated stitch patterns would just get lost in the texture of the Homespun, the Soft Bouclé, or the Jewel Box, so I used simple patterns. I rarely follow the patterns exactly. I follow the increase rounds only until the hat fits the top of my head. Then I follow the rounds worked evenly only until the hat is as long as I want it, usually until it just covers my ears. Then I follow the brim rounds, but sometimes I change the edging.

I bribed my daughter into posing for me again. Shy Brigid didn't want too much of her face showing, but she balked at my idea of turning her into an anonymous mannequin by covering her head with a stocking. Go figure. So these pictures will show only glimpses of her face. Too bad. She's a beautiful young woman.

This pattern from Bev's Country Cottage calls for Chenille Sensations yarn, but I used Homespun (with a P hook) and Soft Bouclé (with an N hook), with nice results. I've made a bunch of these hats. Below are photos of two of them. Click on the pictures for a larger view.


This hat is made from Lion Brand Homespun. Posted by Hello


This one is made in Bernat Soft Bouclé. Posted by Hello

I made this Crochet Cloche, with Homespun for the hat and some leftover Jiffy (in Duluth) for the rosette. I followed this pattern fairly closely, even using the suggested hook sizes—something I rarely do! I crochet tightly, so I normally use a larger hook than a pattern calls for.


Here is the Crochet Cloche made with Lion Brand Homespun. Posted by Hello

I made several hats based on Janelle Schlossman's hat pattern A Little Bit of Funk. Her pattern calls for two strands of worsted weight yarn, and the stitches are worked in the back loops only. I used only a single strand of my yarn, and I worked in both loops. Because I used only one strand and because the yarns I used aren't as stiff as worsted, my hats don't have the pronounced brim that her hat does. Instead, my brims are much floppier and more ruffled. I like how these turned out.


This hat is made from Caron Jewel Box. Posted by Hello


This one is made from Lion Brand Wool-Ease. Posted by Hello


And this one is made from the Soft Bouclé. Posted by Hello

I liked all the hats I made out of these yarns, but I really like the fabric I created with the Bernat Soft Bouclé. I used this yarn once before for a really lacy open poncho, and I liked that well enough. But I like the texture of the fabric made with simple single crochet much better. So now I'm going to have to make something else out of this yarn.


Here's a close-up of one of the hats I made from the Soft Bouclé. I really like the appearance of this fabric. I also really like this picture of Brigid. Posted by Hello

Monday, February 07, 2005

Crocheting Circles


To crochet a circle, you need to increase each round. If your shape buckles, you're crocheting too tightly. In that case, you might try a larger hook.

I'm going to use sc in this suggested pattern, but you can use hdc, dc, whatever. If you use hdc or dc, you need to chain a few more for your starting ring and work a few more stitches in the first round, but this is the basic idea here. In this pattern, I suggest joining at the end of each round. As an alternative, you can work continuously, making a spiral. In that case, don't ch 1 at the beginning of each round, and do be sure to mark your first stitch in each round. I use small safety pins to mark my stitches.

***********
Chain 3, join with a sl st into the 3rd chain from the hook.
Round 1: ch 1, work 6 sc into the ring, join with a sl st. (6 st)
Round 2: ch 1, work 2 sc into each st, join with a sl st. (12 st)
Round 3: ch 1, (sc in next st, 2 sc in next st) repeat around, join with a sl st. (18 st)
Round 4: ch 1, (sc in next 2 st, 2 sc in next st) repeat around, join with a sl st. (24 st)
Round 5: ch 1, (sc in next 3 st, 2 sc in next st) repeat around, join with a sl st. (30 st)
Round 6: ch 1, (sc in next 4 st, 2 sc in next st) repeat around, join with a sl st. (36 st)
etc.
Each round you increase 6 stitches.
***********

Worked in this manner, your increases will all be in the same place and you'll end up with a six-sided shape, which isn't really a circle. If you can pay enough attention to what you're doing, you can space the increases (2 sc in next st) differently on each round, and your shape will be more like a circle. For example, in round 5, instead of working (sc in next 3 st, 2 sc in next st), you might work (sc in next st, 2 sc in next st, sc in next 2 st) around. The part in the parentheses still makes 5 stitches either way, but it just puts the increase in a different place.

Another way to get a more circular shape is to start with more stitches in the ring. For example, you might chain 6, join with a sl st; then chain 3 and work 11 dc in the ring, which would give you 12 stitches in the ring (the chain 3 counts as your first dc). Then each round you'd increase 12 stitches. This will give you a twelve-sided shape, which also isn't really a circle, but it's closer to a circle than a six-sided shape is. And if you space those 12 increases out differently each round, that will make your shape even more circular.

***********
Here's the generic pattern, where:
•N is the number of chains to make the beginning ring;
•Y is the number of chains for the first stitch of each round (ch 1 for sc, ch 2 for hdc, ch 3 for dc);
•X is the number of stitches you crochet into the ring in the first round.

Chain N, join with a sl st into the Nth chain from the hook.
Round 1: ch Y, work X stitches into the ring, join with a sl st. (X st)
Round 2: ch Y, work 2 stitches into each st, join with a sl st. (2X st)
Round 3: ch Y, (stitch in next st, 2 stitch in next st) repeat around, join with a sl st. (3X st)
Round 4: ch Y, (stitch in next 2 st, 2 stitch in next st) repeat around, join with a sl st. (4X st)
Round 5: ch Y, (stitch in next 3 st, 2 stitch in next st) repeat around, join with a sl st. (5X st)
Round 6: ch Y, (stitch in next 4 st, 2 stitch in next st) repeat around, join with a sl st. (6X st)
etc.
Each round you increase X stitches.
***********

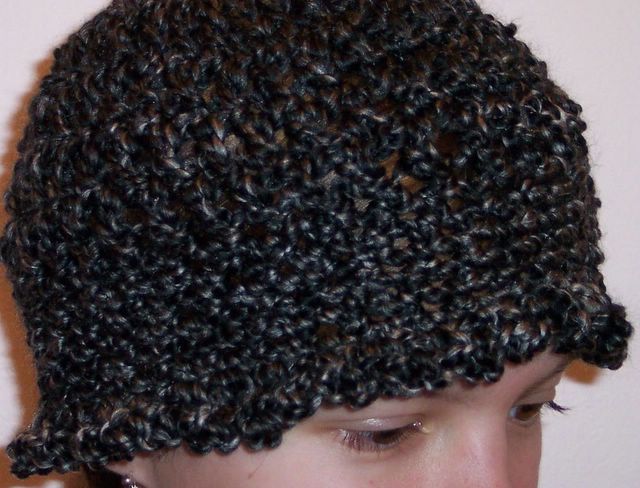
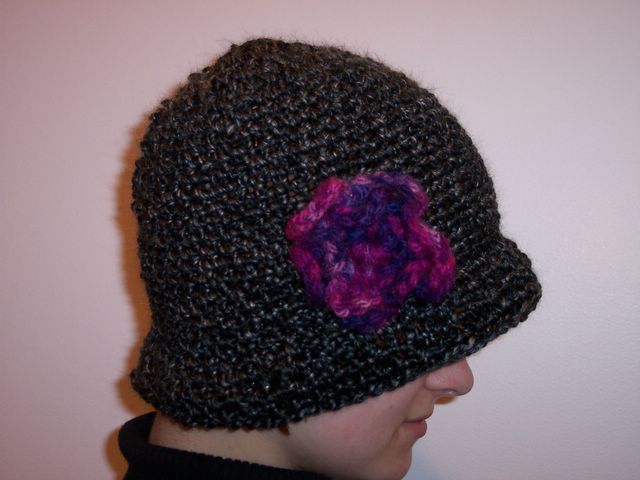
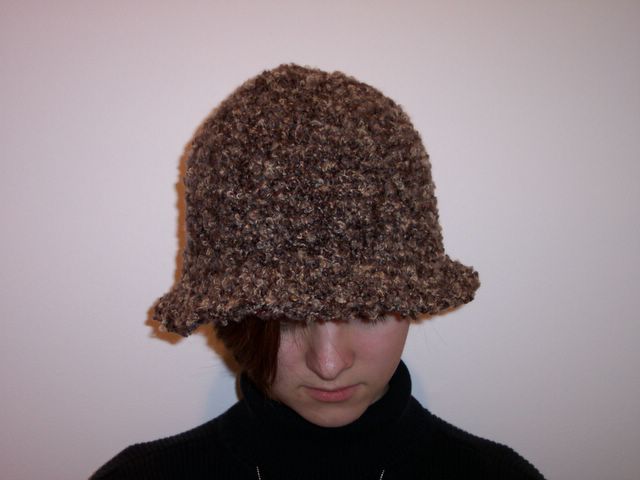
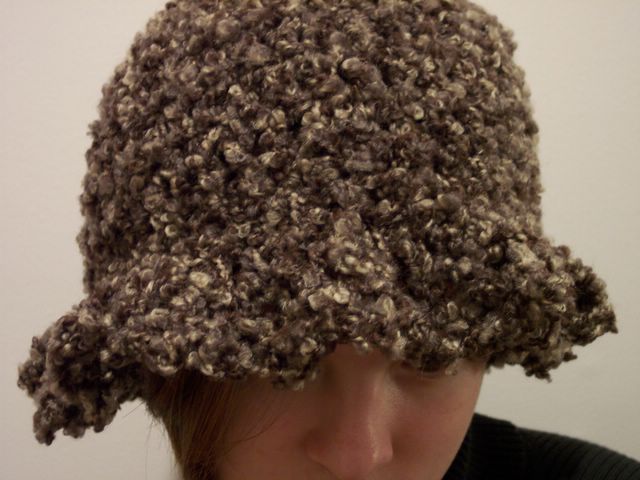
To make a hat, you start with a circle. Once the circle fits the top of your head, you stop increasing each round, and instead you crochet even. The shape will turn on itself, becoming a hat. I leave a stitch marker in the first stitch of the last round that I increase. This way, if I decide the hat is too tight, I can rip back to that point and work another round of increases.

I'm almost finished making hats, and then I'll post some pictures and links to patterns.

Tuesday, February 01, 2005

Mathematical Crochet


I've recently been interested in crocheted mathematical objects.

The easiest one to understand is the Möbius (or Moebius) strip. You can make a Möbius strip with a long thin rectangular piece of paper. Hold the two ends, give the paper a twist, then tape the two ends together. The cool thing about the Möbius strip is that it has no inside or outside. That is, the strip has only one side, even though it looks like it has two. Using a pencil, start at any point on the strip, follow the strip around, and you'll touch each side of the strip and end up back at your starting point. A good illustration of a Möbius strip is M.C. Escher's Ants. A Möbius strip makes a great scarf or shawl. It has a natural drape that allows it to rest nicely on your shoulders. I've made this pattern, although I used Lion Brand Homespun.

Another mathematical concept that illustrates the "no inside or outside" principle is the Klein bottle. Here's a pattern for a crocheted Klein bottle. This knit Klein hat gives a good explanation of a Klein bottle, but of course we need a crocheted Klein hat. While you're looking at the crocheted Klein hat, just for fun, look at the rest of this cute guy's website.

Fractals turn up in crochet, too. This pattern makes the Sierpinski triangle.

Crochet can also be used to construct a hyperbolic plane. A pattern for a hyperbolic plane is here.

And for a seriously dedicated mathematician/crocheter, check out the Lorenz equations crocheted by Dr. Hinke Osinga!